Google Cardboard Unity Tutorial
Having tried the Oculus I’d prepared myself to be completely unimpressed by Google’s $2 VR solution. But after trying Roller Coaster VR I was blown away by how well the slightly shabby looking cardboard assembly performed. Naturally despite never have tried any game development or 3D modeling, I wanted to make stuff for it. Using Unity and some plugins, this turned out to be surprisingly easy. This tutorial covers the bare minimum needed to go from never having used Unity before, to a simple 3D environment you can look around using Google Cardboard.
Prerequisites
- Latest version of Unity (http://unity3d.com/unity/download)
- Google Cardboard (https://cardboard.withgoogle.com/) I got mine from Amazon, there are manufacturers springing up all over the world
- The Android SDK (https://developer.android.com/sdk/index.html?hl=i). This assumes you want to build and run on the Android platform. This tutorial will work with iOS but the build process at the end will be different.
Get Setup with Unity
The first step has nothing to do with Google Cardboard, we just need to get a simple 3D environment created within Unity with a character who can move around and interact with it.
No point in re-inventing the wheel here, this excellent tutorial gets you up and running with such an environment in about 12 minutes: https://www.youtube.com/watch?v=fRED_-LvJKQ&list=PLPV2KyIb3jR7F_B4p8X3YwHPaExh0R9Kk.
That entire series of tutorials is a really accessible introduction to Unity so I’d recommend coming back to the remaining ones later on. Each one is recorded as a single take so sometimes the author makes mistakes he goes back and fixes later on. I made the mistake several times of pausing the video when I saw an error and spending ages trying to fix it myself, only to find out that he explains how to resolve it immediately afterwards.
Once you’ve completed that tutorial, continue below to add Google Cardboard integration.
One Camera for Each Eye
At the moment our game window looks something like this:
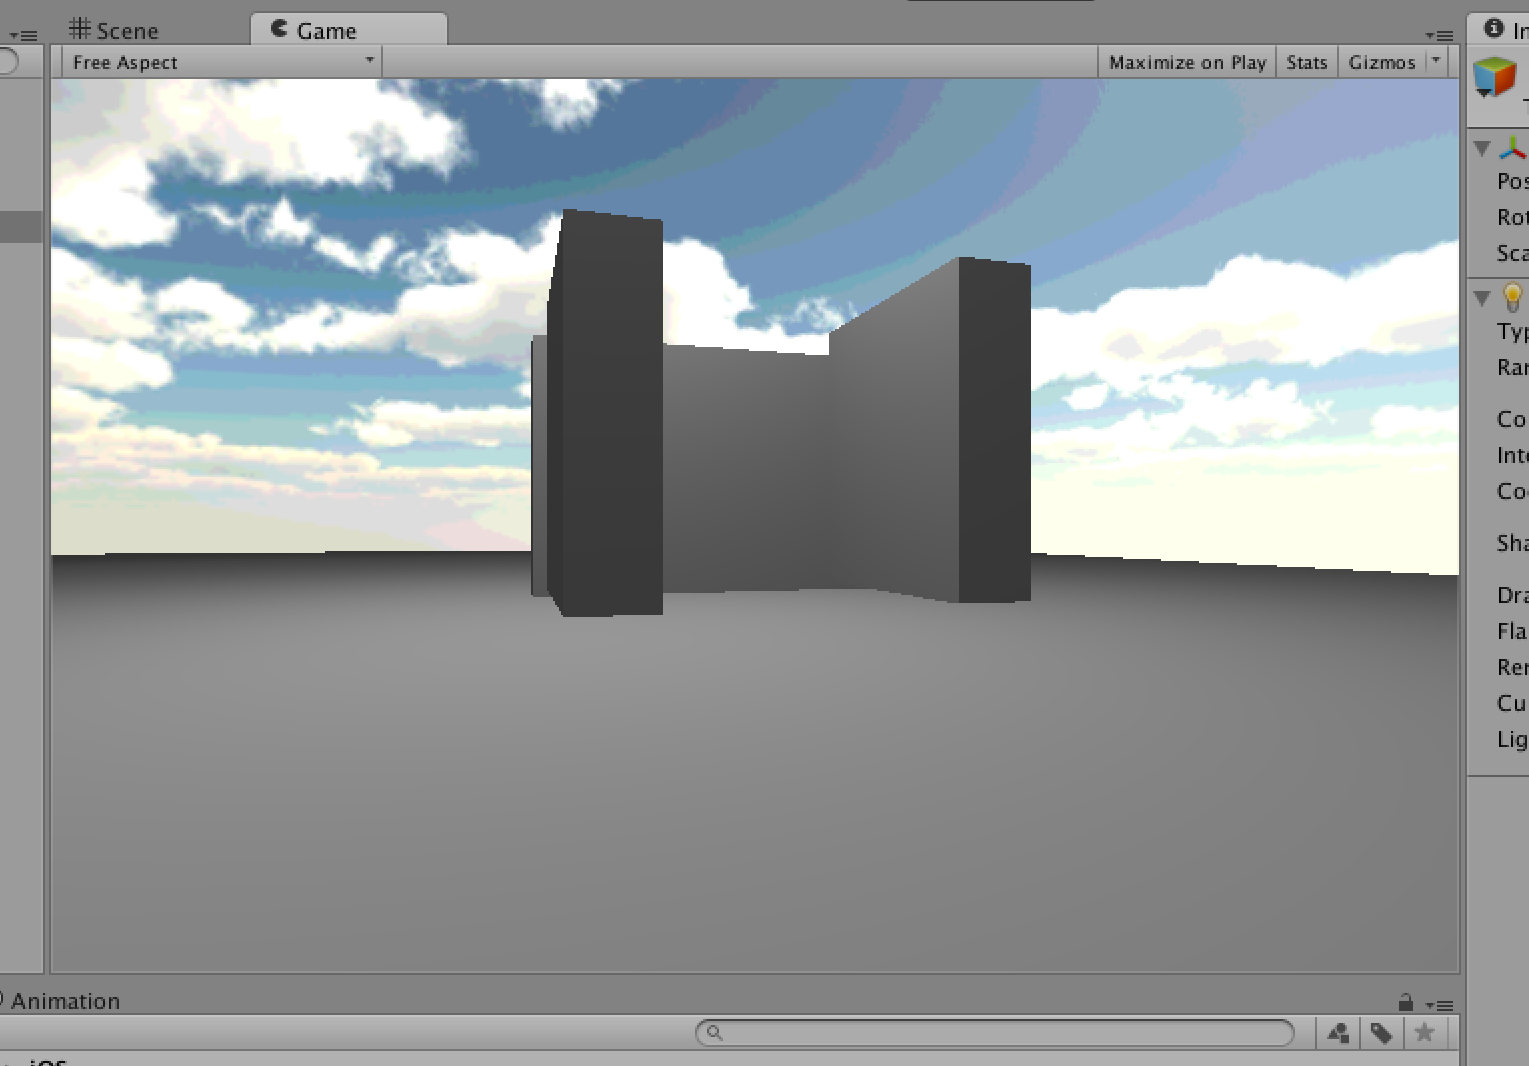
We have a single camera, some simple 3D shapes and a point light source. The camera is attached to the player which can be moved around with the arrow keys.
For this to work with Google cardboard, we need to add a second camera, so we have one for each eye and set these up to be offset from the center of the viewport by equal amounts.
Begin by renaming the existing camera (mine was called “MainCamera”) to “LeftCamera” and then in the inspector, changing the following values:
- Position X : -1
- Field of View : 60
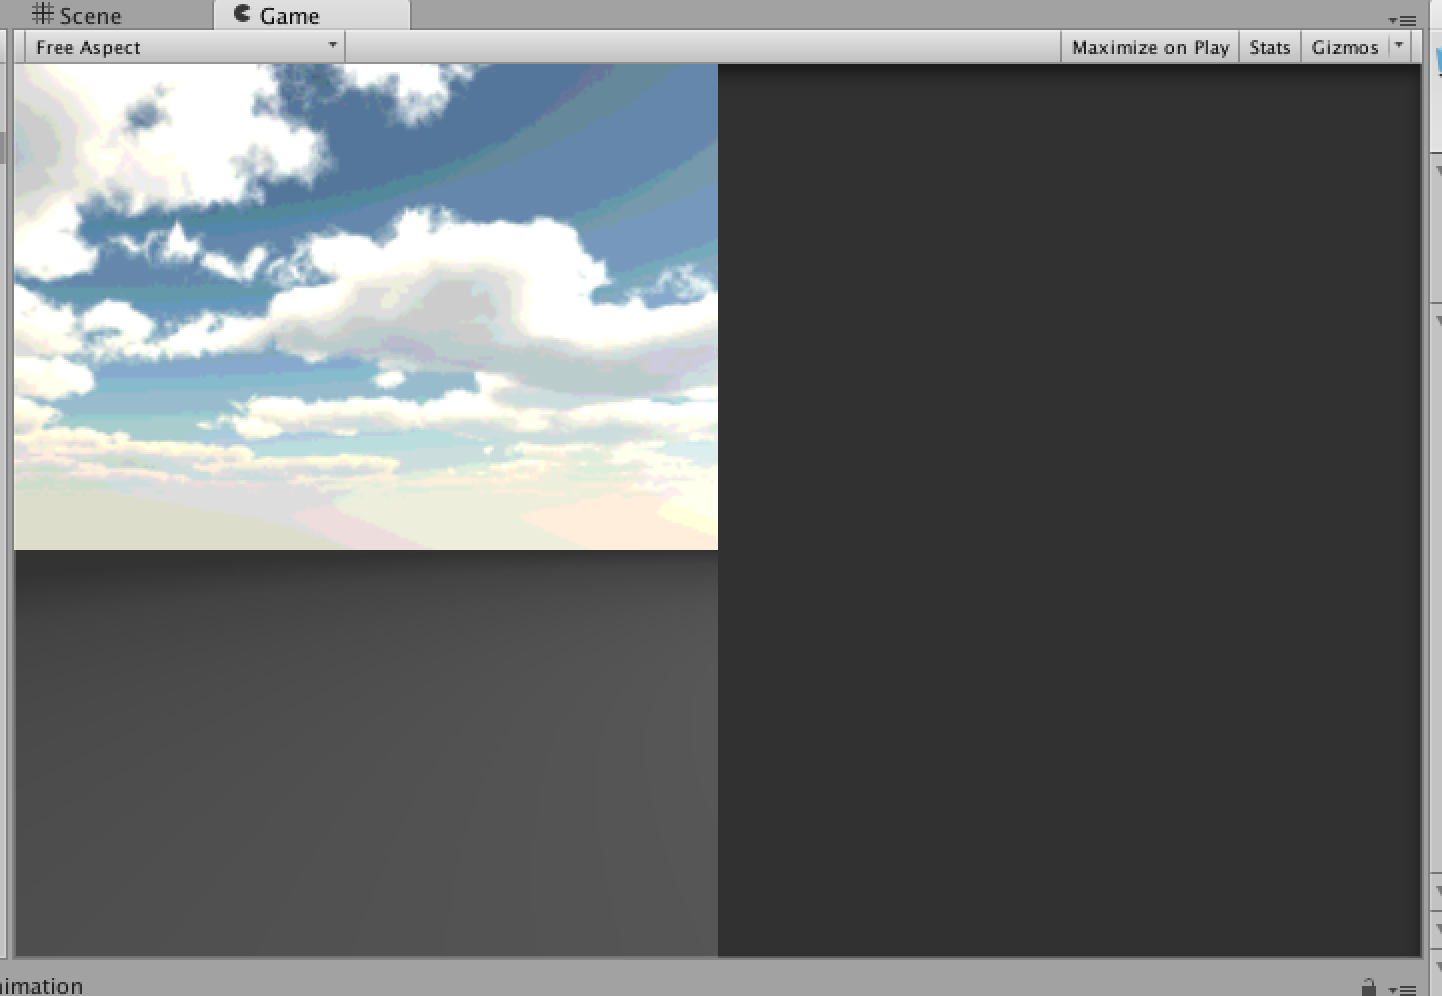
- Viewport Rect W : 0.5
This should give you a game screen similar to before but filling only half of the viewport:
Now right click on “LeftCamera” in the Hierarchy and choose Duplicate. Rename the newly duplicated “LeftCamera” to “RightCamera”.
Then in the inspector for RightCamera, change the following values:
- Position X : 1
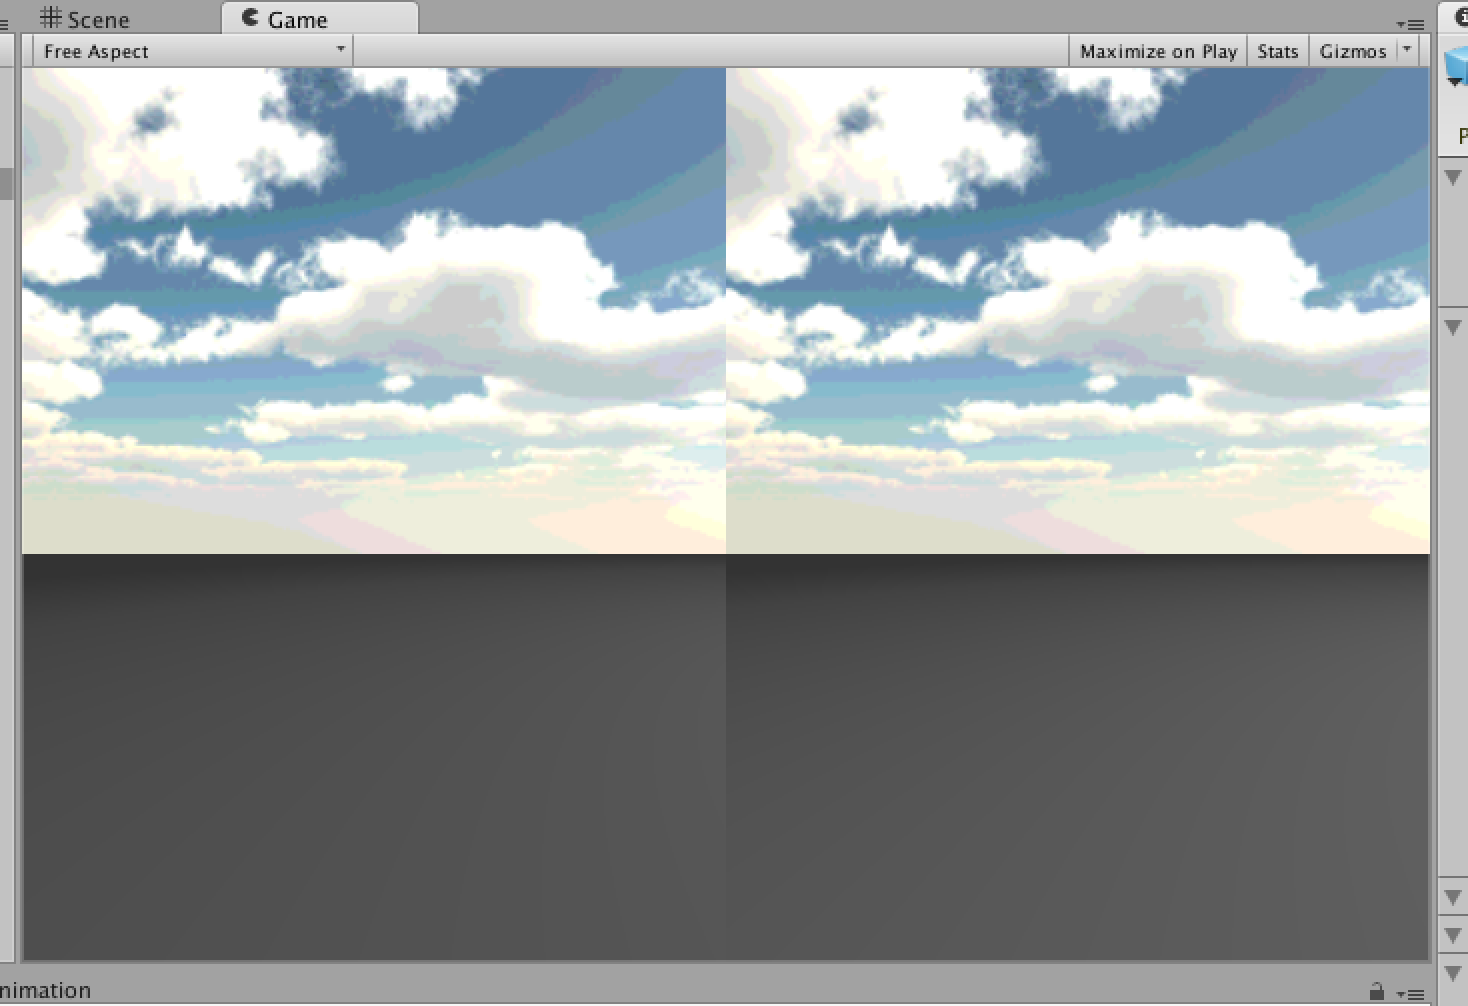
- Viewport Rect X : 0.5
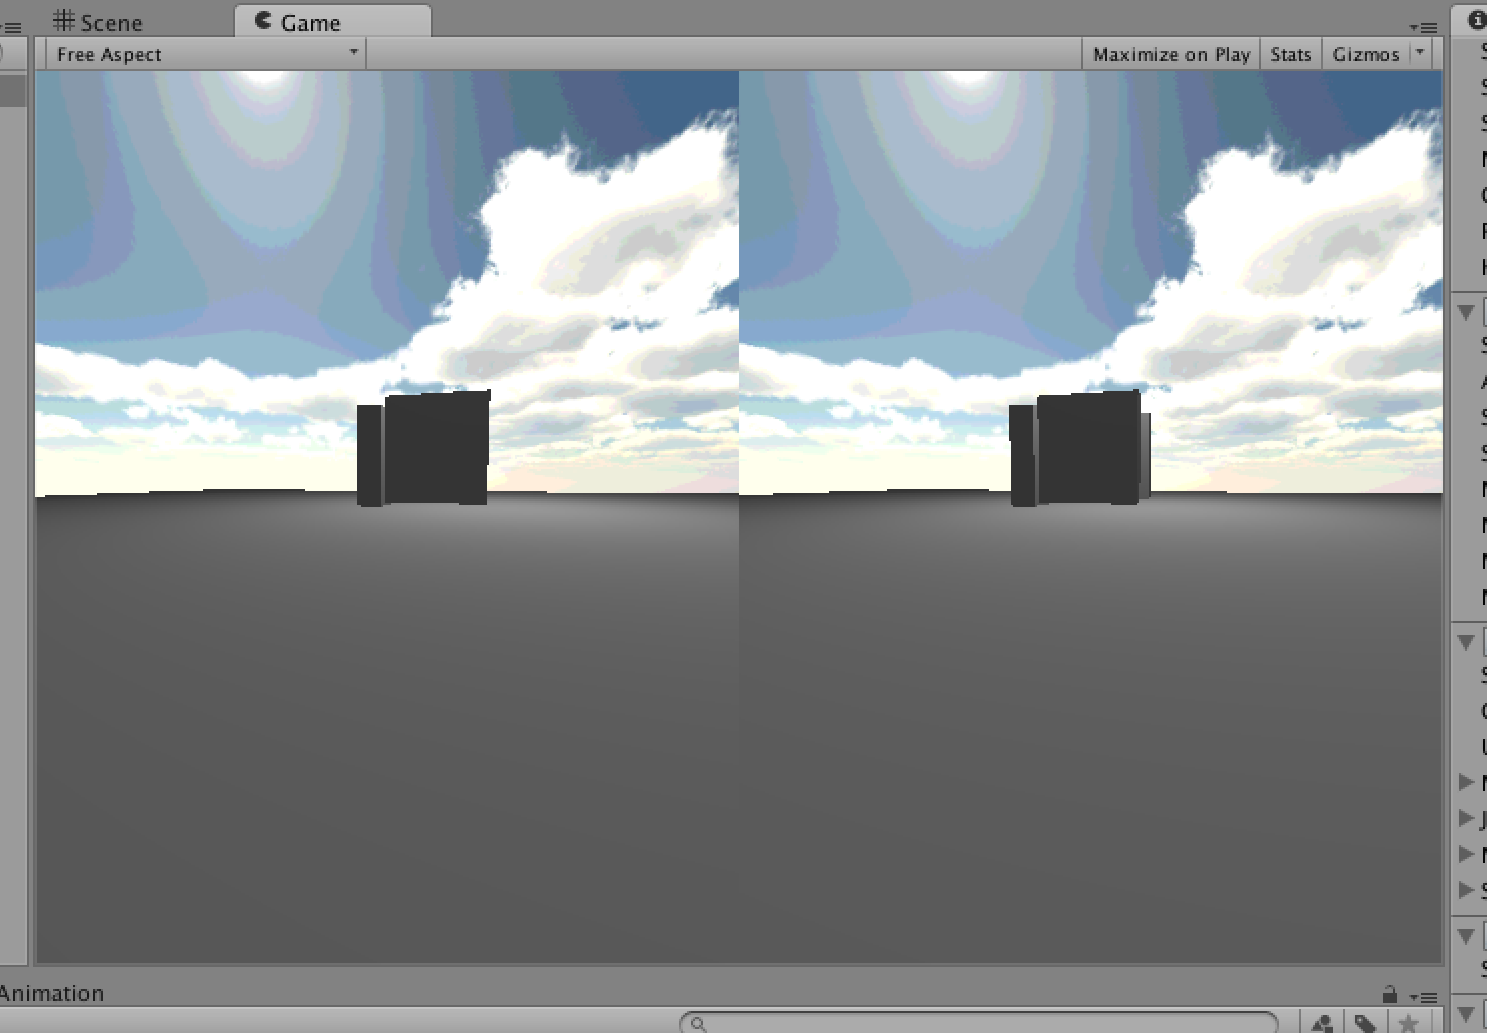
This should give you a viewport which is split down the middle, with one camera for each eye:
If you were to load this onto a device now and look at it through Cardboard, it would work. But you wouldn’t be able to look around so it wouldn’t be that interesting.
Adding Head Tracking
One of the biggest challenges with Google Cardboard is that the only forms of user input are head movement and a magnet based switch on the side. The most impressive is the head tracking which uses the Gyroscope to detect exactly where the user is looking.
This would be quite challenging to implement smoothly from scratch but luckily the clever folk at Durovis have created a Unity plugin which will take care of it for us.
Begin by downloading the plugin from https://www.durovis.com/sdk.html and double clicking on the .unitypackage file once it’s finished downloading. This should automatically open the Unity import dialog.
Don’t change any options on the import window and just click “Import”. You may see an error about not having Blender installed at this point, for now this can be ignored.
Now select the “Player” in the Hierarchy (the parent object to your two cameras) and in the Inspector click “Add Component” at the bottom.
Select “Scripts” and then “Open Dive Sensor”. You’ll then see a pane for configuring the Open Dive Sensor.
There are two attributes which need setting here:
- Cameraleft
- Cameraright
Which are shown below:
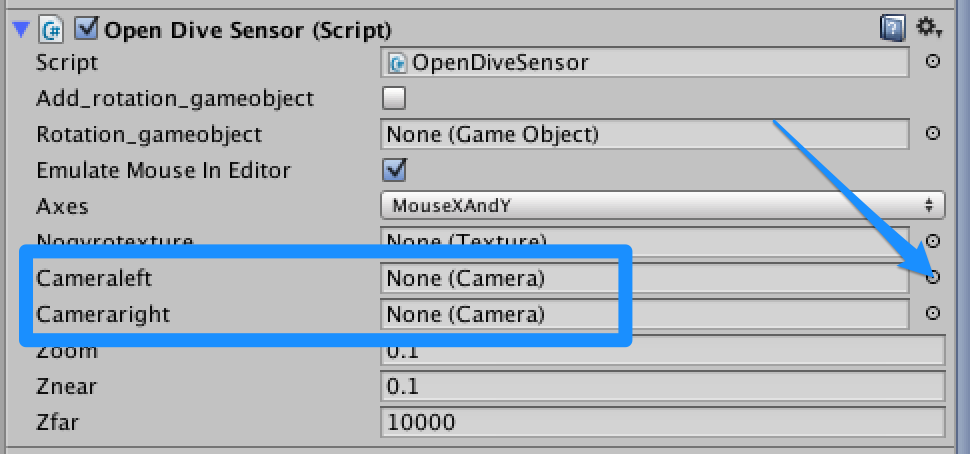
Click the button to the far right of Cameraleft (see the arrow in the screenshot above) and in the dialog which comes up choose “LeftCamera” by double clicking on it. Repeat the process for Cameraright, choosing “RightCamera” in the dialog.
If you select play now and look at the game window, notice that there is distortion added to correct for the lenses in Google Cardboard:
Trying it out
We’re now ready to test the scene with Cardboard.
Begin by selecting “File” and then “Build Settings”. Add our current Scene to the Build by clicking the “Add Current” button (middle right).
Under Platform select “Android”. Make sure your Android device is plugged into the computer using a USB cable and that USB Debugging is enabled (this varies between Android devices but a quick Google Search should do the trick).
Having selected Android, click on “Player Settings” which will load the settings in the Inspector window. Under “Other” you’ll need to enter a bundle identifier:
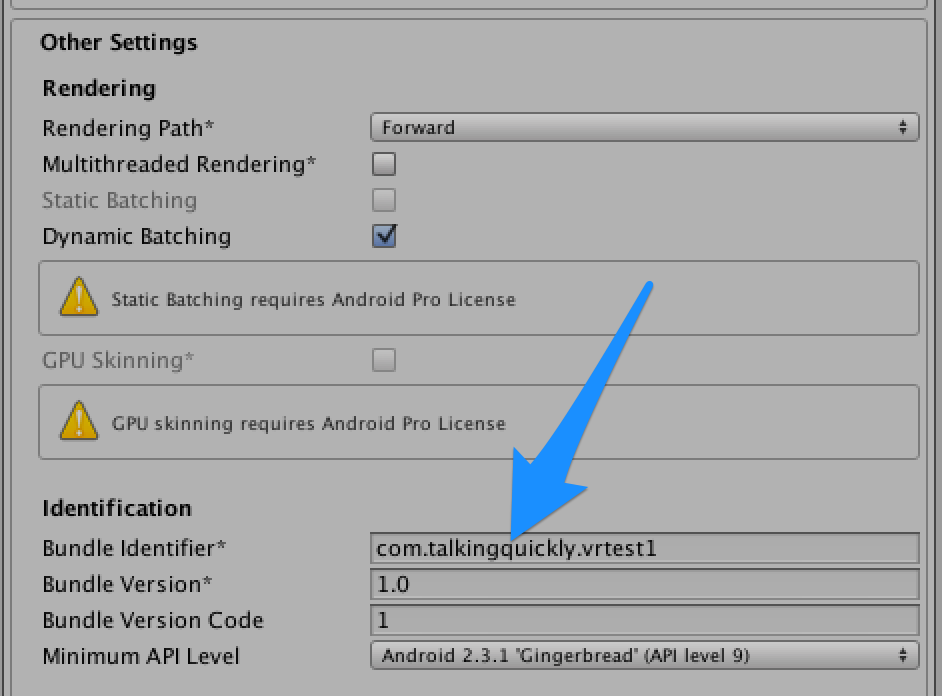
Now choose “Build and Run” and wait for the build process to complete. When asked for a file location initially, choose somewhere to store the generated APK (Android Installer). This file can be copied to you device for installing manually or sent to friends.
At some point it will also ask you for the location of the Android SDK. Because everyone read the “prerequisites” section of this post, this will already been downloaded and extracted somewhere (or not!).
I’d downloaded and extracted this in my ~/Downloads folder so the SDK was located in ~/Downloads/adt-bundle-mac-x86_64-20140702/sdk.
Once the process completes, the application should automatically launch on your device. Slot it into Google Cardboard and look around!
The next big challenge is finding a way to get user input. The magnetic button is clever but hardly that useful for fine grained directional control and expecting people to have a gamepad available is unreasonable.
My current thinking is to allow a computers arrow keys to be used as input via web sockets, or eventually hand gestures recognised by the camera.
Any questions or comments, find me on twitter, http://www.twitter.com/talkingquickly.
References
http://www.sc0ttgames.com/?p=293
https://www.youtube.com/watch?v=fRED_-LvJKQ&list=PLPV2KyIb3jR7F_B4p8X3YwHPaExh0R9Kk
https://www.durovis.com/board/viewforum.php?f=1&sid=a3e36bc84f5e3e70f7bb00c9b11af7a2
http://forum.unity3d.com/threads/cardboard-vr-by-google-for-android-only-45.253903/

Ben Dixon
My name's Ben Dixon, I'm the co-founder of Sona where we're building the operating system for the worlds deskless workforce. I'm an experienced CTO, LLM geek, lover of good coffee and above all, making things. Also a regular conference speaker, author and travel addict. Chat to me on twitter @talkingquickly